Saturday, October 28, 2017

A plus quilt to restore my mojo

Every once in a while I feel like in order to be *good* I must do something complex or new. I need to be uber creative in order to produce something that is *good*.

The irony is that thinking like that completely cripples me, creatively. I draw out designs or try to come up with a way to reinvent the wheel or put a very unique spin on something that, when the ideas don't come, I feel inadequate or unqualified to call myself a "quilter".

This happens more than I would like it to. And in those moments, there is nothing really happening and it kind of sucks the fun out of making for me. The most recent occurrence was a bundle I got from Janum fabrics  during one of the Tuesday night bundle specials Majd hosts weekly on instagram. This particular bundle made me super happy. One, because it was boy themed. (Are we allowed to say that still? I mean no offense.) There is no shortage of girly quilts or color palettes in my stash and the majority of the quilts I make tend to be geared more towards girls. So when something comes along that screams BOY!! it makes it a lot easier for me. Like this bundle I purchased. Second, there were reprints from Sarah Jane, which I happen to LOVE!

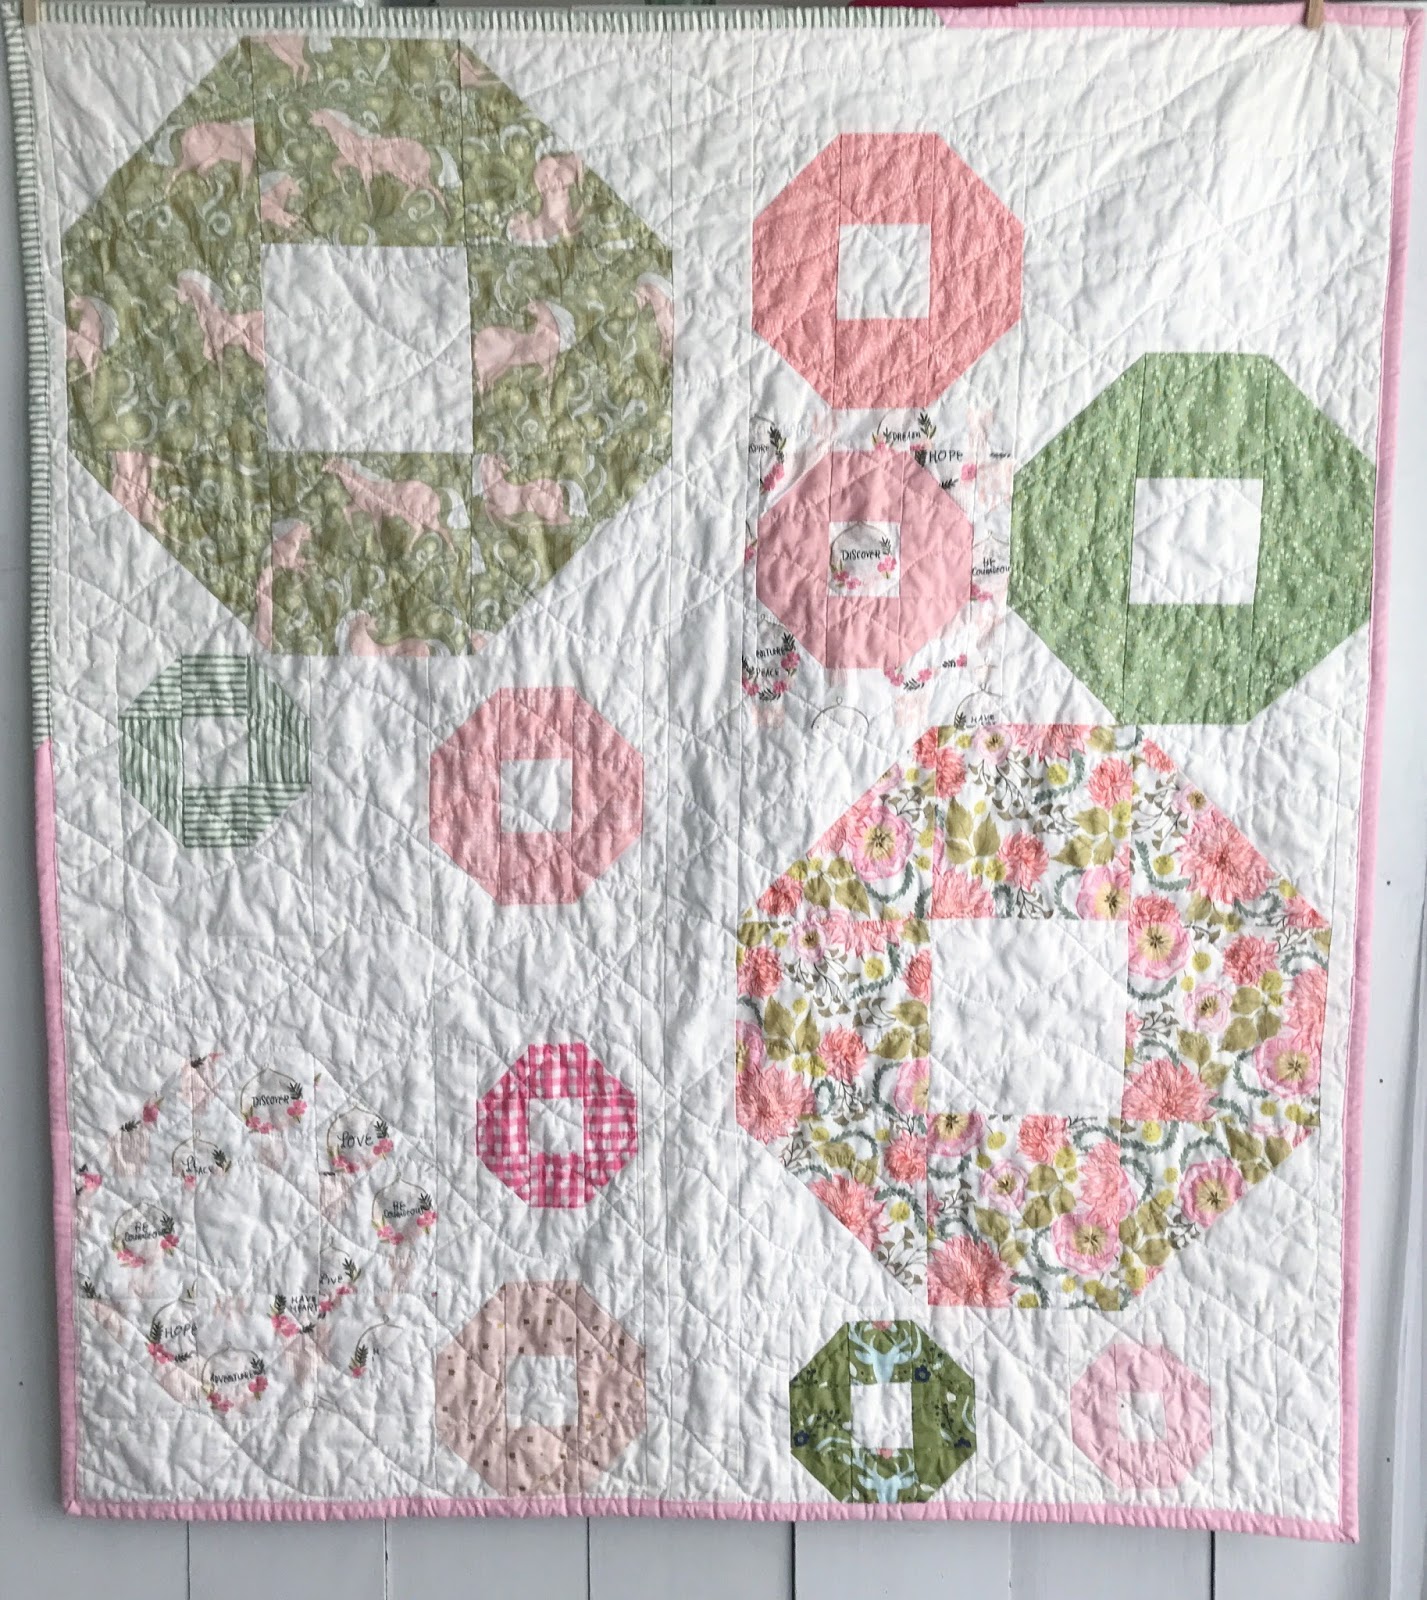
But I got hung up on wanting to create something "complicated" or "original". So it sat, atop my fabric shelf, staring me down. Finally, this week, I decided to get over myself and go with my original "non-complex" idea for the bundle-- a simple plus quilt.

And you know what? I am glad I did. When did I decide that simple is less than??? The reality is, the simpler designs are always the ones that make me most happy. So here it is. My simple plus quilt.


Sometimes I play a game where I make myself choose my a fabric in a quilt that I love the best. 


In this quilt, it was a tie. Between the little boy pirates, looking for treasure.......


...and those incredible whales above. 


I backed it in a gray minky fabric that makes it super luxuriously soft and cuddly. 


Those ships!!!


I need to remind myself often that the pattern doesn't need to be super elaborate to be beautiful. 

Happy Weekend, friends!


Linking up with the following:

Finished or Not Friday at Busy Hands Quilts


Saturday, October 7, 2017

Sewing small

I am pretty sure it goes without saying that I love to make quilts.

Sometimes, though, I NEED to make something-- in a color scheme or print or collection of fabric-- but I just don't have the drive, the mental energy, or the time to create a big quilt.

Instead, I sew small. My desire to make comes in waves, and I tend to burn myself out on big things, and it is in those moments that I make small things. 

Pouches, mug rugs, bags, pillow covers, mini quilts..... those are my favorites. So today I am sharing some of my favorite little things I have made. 


What are your favorite small things to make?


Friday, October 6, 2017

Caturday Eve, and a Simple, Beginner-Friendly Quilt

I bought the most adorable little bundle from Cassie's #happyhumpdaybundlesale  a week ago-- adorable little cat prints in pink, gray, black and white. I am not especially crazy about cats, but I do love some adorable fabric and this bundle was it.

I hemmed and hawed about what to make with it and went back and forth and basically annoyed myself with my indecision. Indecision KILLS me. I waste so much time going back and forth and debating things in my head that it can really kill my productivity--- with every thing, not just quilting.

So, annoyed with myself, I said heck with it, and just cut into the fabric to make myself commit. That's one way to do it, right?

I cut big 8.5 inch squares of the 8 fabrics in my bundle and then grabbed a few more from my overflowing stash.

**If you are new to quilting or wanting to try to make a quilt, a pattern like this is a great, easy quilt to make!! Scroll to the end of this post to learn a simple way to make this!

I added in one of Amy Sinibaldi's Half-Hearted blocks for a little added interest, and sewed my blocks together. Easy peasy.


I just quilted along the seams- I love doing that because it is simple and understated and looks so pretty from the back.


Black and white striped binding will always be my favorite! And what did I ever do before these binding clips made my life so easy?!?


The finished quilt.


It ended up being about 41 x 48 inches. 


Those simple lines make me really happy.


If, by some small chance, you happened across my blog and are not a quilter, but interested in making something handmade for someone you love, I think this is a PERFECT beginner friendly quilt pattern. I used 8.5 inch squares, but a lot of quilt shops sell pre-cut squares called a Layer Cake. A Layer Cake is cut squares of fabric measuring 10 inches. These fabrics are usually put together from a single collection, so they all coordinate with each other, and make it super easy to get started. 

I am including links to shops that have fun layer cakes available HERE, HERE, and HERE.

You can leave the squares at 10 inch, or if you want to make the size of quilt I made, you can trim them to 8.5 inch square. If you are making a baby quilt out of 10 inch squares, you can arrange them in a 4 by 5 block layout, which would yield a quilt that is about 38.5 inches wide by about 48 inches tall. 

You would just place your squares in layout that makes you happy. I typically lay them out on my floor, and shift things around so no like-color is touching each other. 

Then all you have to do it stitch the squares together to make a row. I then press the seams alternating to the left for one row and to the right for the next row so I can lock the seams together. If your squares are not perfectly matched up- no worries!! Babies and kiddos are not that particular and will be thankful to have a handmade cuddly quilt more than they will care about matched points. But if you are wanting to work on your seam nesting and matching points, you can read this post I wrote about how I achieve matching points

Once you have each row stitched up, just connect them all until you have a quilt top. If you're anything like me, and sometimes just want an easy quilt back, you can just get 1.5 yard of your favorite fabric from your local quilt shop or etsy shop, and use that one piece as a backing. 

I love big patchwork because it allows the fabrics to shine and doesn't take forever!

Happ Friday!

Linking up here:


Thursday, October 5, 2017

The geese have my heart

When making quilts, very, very rarely (read: pretty much never) do I follow a pattern.

I buy patterns all the time. But I use them as base to begin, not really a follow to the letter set of instructions. I do better when I have freedom and don't feel confined. Partly because I like things to come together in an --pardon me for using this word because it is so overused-- organic fashion. But also because if I am not following a pattern, then I can't technically be wrong or make a mistake. haha. So really, my opposition to following instructions is really just me not wanting to spend time fixing or undoing. haha.

Case in point. I bought the Totem pattern by Carolyn Friedlander a year or so ago. I loved that pattern from the moment I saw it. I love anything Carolyn Friedlander makes, so it was no surprise, but these angled strips just spoke to me. So, I bought the pattern.

I read through the pattern twice, and then set off to make something. So the pattern and instruction was fresh in my mind and guided everything I pieced, but I did not follow strip size or anything else. Despite that, it ended up looking pretty similar to the Totem pattern.


You can see more of my Totem-inspired quilt here

Doing my own thing feels so much better to me, because it doesn't hamper my creativity, and it is a way of giving myself permission to mess up.

And in experimenting, sometimes I find something I truly love. I was fiddling about when I ended up creating the design for my big geese quilts, and that quilt is something I have made several times now (each one, different in size and background because  not only do I NOT like to follow patterns, but I rarely take the time to write things down as I go, so I only remember bits and pieces of what I did.)

I have made a few versions of the big geese on a large pieced background, and you can see some of them below.


Clearly, I am a fan of this design, and love it for showing off big prints. So when I bought an adorable bundle of Menagerie from Fabric Bubb this was *just* the quilt I wanted to make with it.


I backed it with a yard of my beloved Amy Butler Floating Buds fabric, and now I feel I need to buy 50 more yards of that because I really love it. 

I have this listed in my shop.

And I am linking up with:


Wednesday, October 4, 2017

A rather racy name for a quilt block

Whenever I begin a quilt, it usually starts from one of two or three different foundations: knowing what pattern I want to make, knowing what color scheme I want to use, or having an idea of what I want the quilt to mean, and building from there.

With this particular quilt, I bought a bundle from Cassie of @sewstitchinghappy_shop and decided when I got it, that it begged for a traditional block, but one that really showed off the fabric. Some prints want to be cut up tiny, and some really want to be on display.


In this photo above, it was the pink unicorns set against the olivey, mossy green that I knew I needed to keep in tact. 

So I began thinking of more traditional blocks that I have been wanting to make-- there are plenty of those, because I usually end up creating a more modern design that isn't based on blocks, or of I am doing blocks, stick to simple patchwork, wonky stars, or geese. So my list of "want to try" blocks is long!

I have been wanting to make this "Big O" block for a bit, but wasn't sure about rows of the same blocks.  

First of all, can we take a second to address the fact that I am really an adolescent boy at heart. I read the name of the quilt block and totally giggled. A friend texted me while I was making the blocks asking what I was doing that I couldn't answer her call and I said "just working on the big O!" and I think she about choked on her diet coke. hahahaha. Okay, back to being a grown up.....

The Big O block. (hehehe) I wanted to make it, but not row after row of the O. So I decided to vary the size of the blocks and break them up some. As always, it would have been much simpler and easier on my brain had I devised a plan right away. Instead I just made blocks in random sizes as I went along and placed them where I thought they looked best using my fancy design wall -- master bedroom floor-- and then stitched them together when I had a design I liked. Which occurred after about 329 rearranges. 

I am a big fan of varying the sizes of blocks-- I feel like it makes a design look fresh, but that's definitely just my own taste and preference. 


I feel like rather than rows of O's, it looks more like pretty little donuts floating about. 


Someone on Instagram recently asked fellow quilters about which part of the quilt making process they dread most. I was surprised how many people said binding! I love that part!! Binding, to me, is like reading a wonderful book.You have invested so much time and energy and thought into this book, and you get to the last few pages and it all comes together. That feeling of closing the book and setting it down, completely gratified! That is what binding feels like to me. 

On the other hand, making a quilt backing makes me grumbly. When I finally finish piecing and constructing the top, I really DO NOT want to piece a backing. I just want to get to the quilting! I have a habit of paying my children to do the housework I really dislike (putting laundry away, cleaning toilets...), so maybe soon, I can pay my oldest daughter to stitch up a backing for me! #momgoals

This is the third time I have quilted in big ol' infinity loops, and every time I am pleased with how it looks. Not perfect, not precise, but the curves provide ample crinkle and make it a little more laid back, to me.

This quilt is all done and sitting contentedly in my shop here. 

Happy Wednesday friends. 

Linking up here:


LinkWithin

Related Posts Plugin for WordPress, Blogger...